Template For A Witches Hat
Template For A Witches Hat - Now place the cone inside of the inner circle of the brim and match the seam allowances together. 2) and 3) fold the circles in half gently andu0003cut out the centre of the circles u0003 (we used a coffee mug as a template) Web the bundle includes pdf and transparent png (300 dpi) versions of every pattern. Web sew the cone. Seam allowances ½” unless otherwise noted. Second, decide how wide you want the total width of your hat. Print and cut witch hat pattern. Then fold each of the sections created by your slits up, so that you can secure the cone shape to the middle of the circle that. With construction paper and a few other basic supplies, you can make your own paper witch's hat for a quick halloween or witch's. Use crayons, paint, or markers to color the witch hat. The template will ensure you have a perfectly circular shape and cone for the hat. Add a 1/2 inch to that measurement. Web make a diy witch hat in minutes with the help of this witch hat tutorial video! Second, decide how wide you want the total width of your hat. Slowly begin to pin the cone and brim together. Fold hat top in half, pin along raw edge, and sew with a 1/2 inch seam allowance. Download and print the witch hat template using the link in the supplies section below. For the printable witch hat template, please remember to measure the strips. Use crayons, paint, or markers to color the witch hat. Web make a diy witch hat. With construction paper and a few other basic supplies, you can make your own paper witch's hat for a quick halloween or witch's. Take measurements for the witch hat template. Web make a diy witch hat in minutes with the help of this witch hat tutorial video! Choose from one of these cool witch’s hat designs to color and cut. Sew the long edge to create a cone. Close to the edge of the cone of the mini witch hat, add a line a glue all the way around. This will be your brim. Place the cone inside the the center of the brim. Fold the cone in half lengthwise. *my head circumference is 23 1/4 inches (i added 1/2 inch). Free printable witch hat pattern. For the printable witch hat template, please remember to measure the strips. Hundreds of free printable papercraft templates of origami, cut out. This craft foam which measures 4″ x 6″ can usually be found in packs of 32 pieces for $1.00 attach a magnet. First, measure your head around your forehead. You will be surprised at how tricky this can be for. Cut slits in the center of the circle. Web click here to download free witch hat pattern pieces. I recommend measuring your child’s. Free printable witch hat pattern. Second, decide how wide you want the total width of your hat. Web the bundle includes pdf and transparent png (300 dpi) versions of every pattern. This craft foam which measures 4″ x 6″ can usually be found in packs of 32 pieces for $1.00 attach a magnet on the back so the witches hat. Seam allowances ½” unless otherwise noted. Staple the ends of the construction paper to create a hat. Get the free witch hat pattern here: Start by downloading the witch hat pattern from our etsy shop. If you want the hat to be a bit loose, add one inch instead. Once the glue dries, try on your hat. Insert the cone into the brim and bring it close to the base of the cone. Fold hat top in half, pin along raw edge, and sew with a 1/2 inch seam allowance. Grab some construction paper in the colours that you want to use for your hat. Web create a cute. Then cut 2 strips of black construction paper to attach to the sides of the black witch hat. This is your head circumference. If you are using paper thicker than construction paper, i would recommend using hot glue instead of a glue stick. Head over to the tutorial for all the steps involved. For this part you will want to. Print the template, cut around the dotted lines, and glue the strips together! Web this is an inexpensive halloween craft for children to make. Assemble the 6 pattern pages by following the diagram below. Trim seam allowance, especially at the top point. Download and print the witch hat template using the link in the supplies section below. Web make the top of the hat. Grab some construction paper in the colours that you want to use for your hat. Then fold each of the sections created by your slits up, so that you can secure the cone shape to the middle of the circle that. Place the cone inside the the center of the brim. Get the free witch hat pattern here: Invite your little one to tear the paper using their fingers into small pieces. Cut slits in the center of the circle. Join the cone and the brim. This witch hat sewing pattern tutorial will walk you through the basics for making a witch hat regardless of size. Gently pull the brim onto the glue and allow to dry. Cut small ½ inch slits all along the bottom of the cone hat section as shown on the template.
Printable Halloween Witch Hat Coloring Page for Kids SupplyMe

Halloween Applique Witch Hat Tutorial U Create Halloween applique

Printable Witch Hat Template

Witch Hat Halloween Template Woo! Jr. Kids Activities Children's

Witch Hat Template Witch hat, Halloween preschool, Halloween activities

FREE printable witches hat pattern
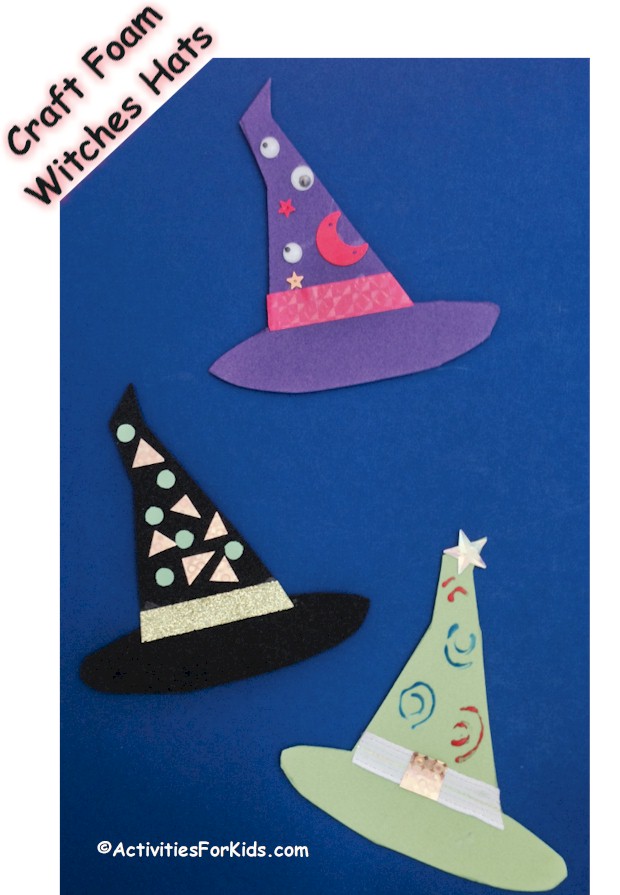
Witches Hat Template for a Decorative Halloween Craft
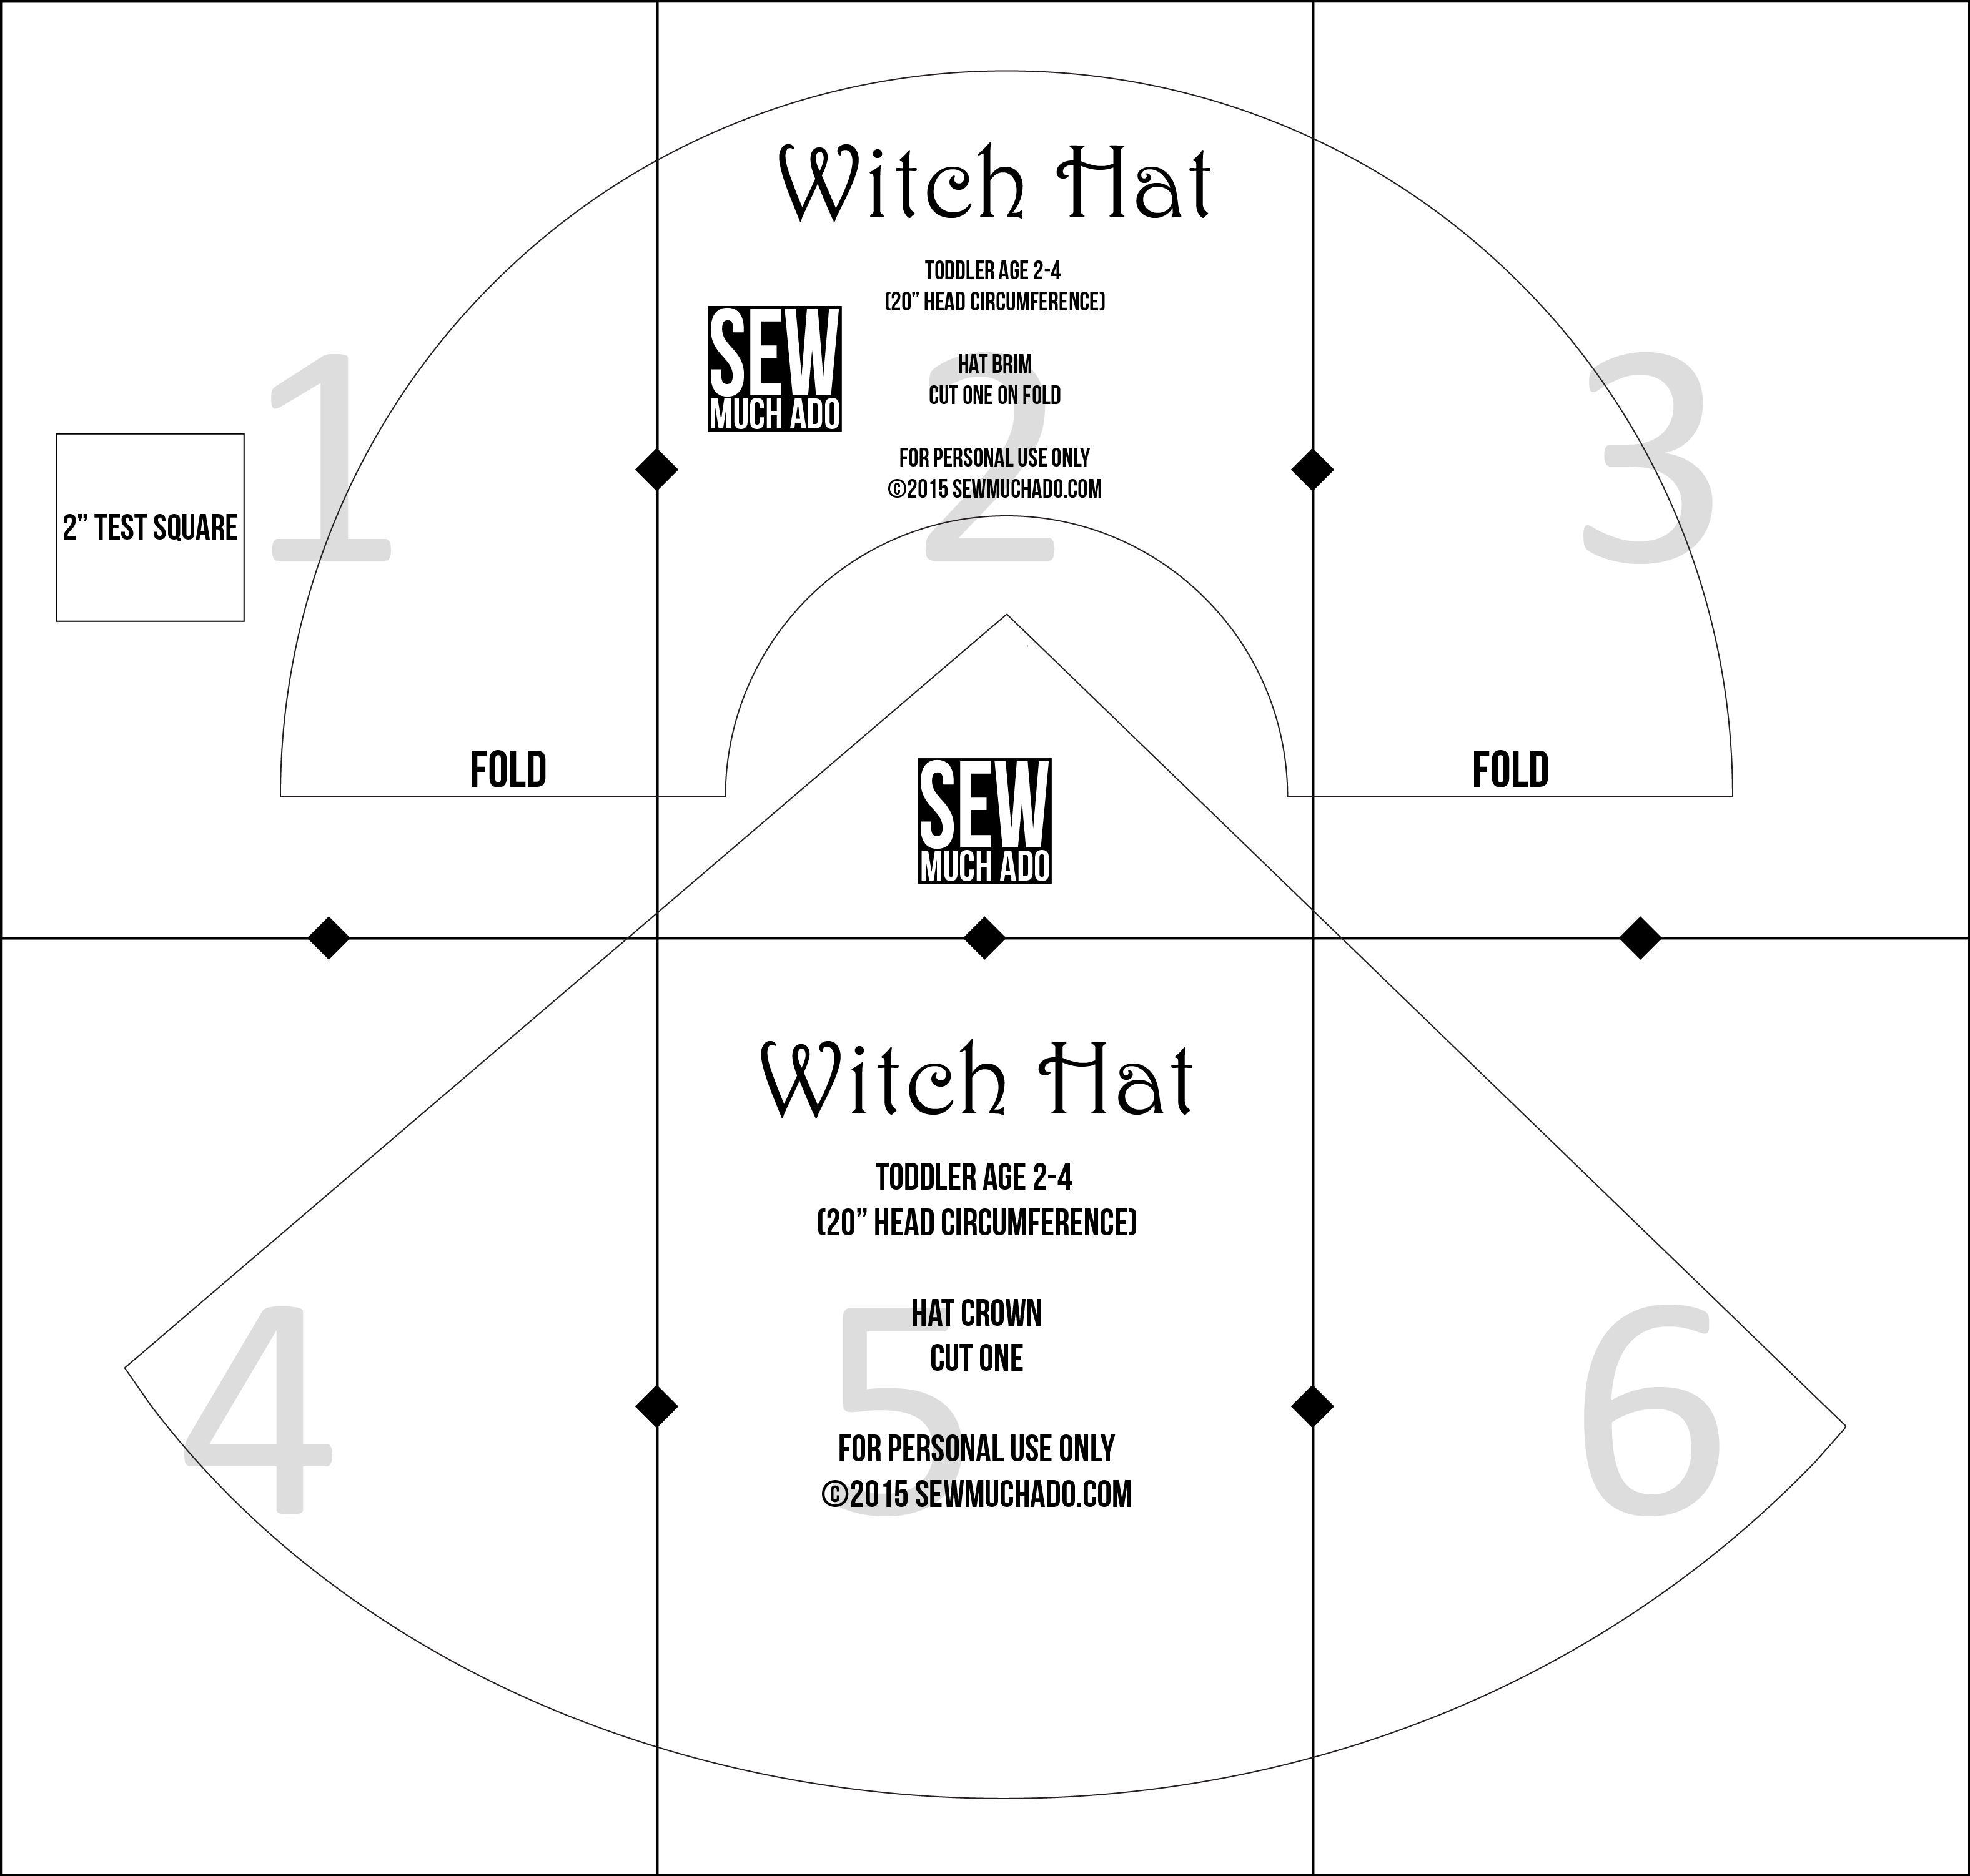
Free Witch Hat Pattern + DIY Witch Costume Sew Much Ado
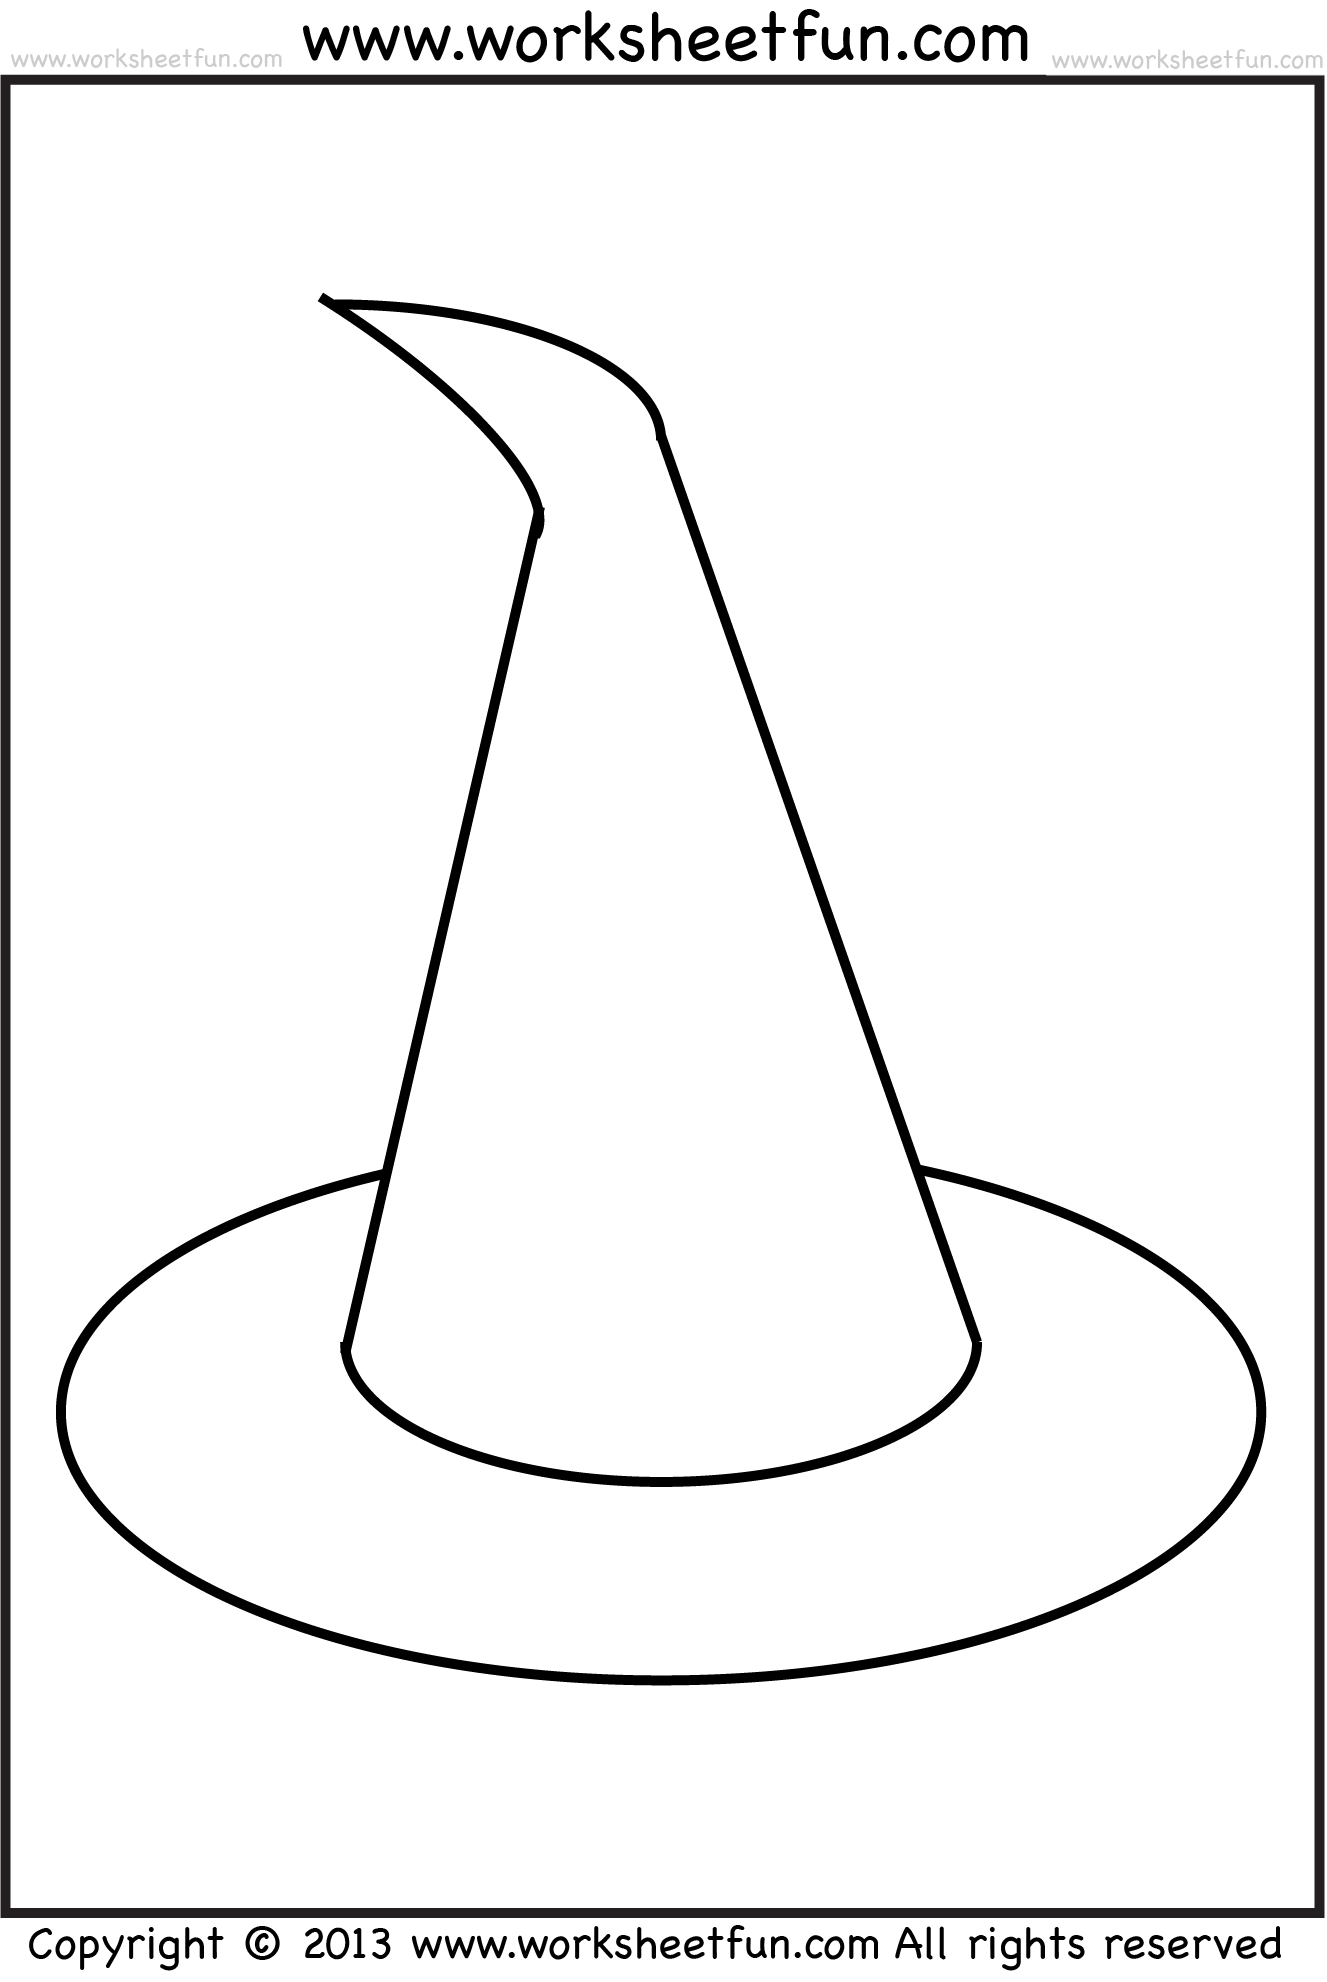
Free Printable Witch Hat Template
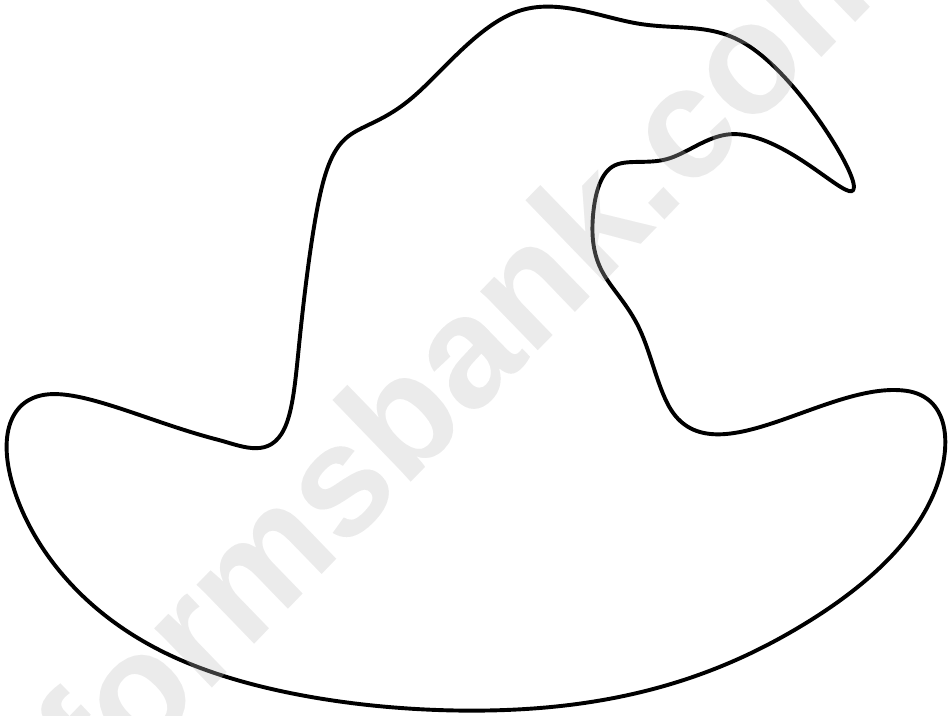
Blank Witch Hat Template printable pdf download
This Craft Foam Which Measures 4″ X 6″ Can Usually Be Found In Packs Of 32 Pieces For $1.00 Attach A Magnet On The Back So The Witches Hat Can Be A Fridge Magnet For.
Start By Downloading The Witch Hat Pattern From Our Etsy Shop.
Assemble The Hat With Glue.
Slowly Begin To Pin The Cone And Brim Together.
Related Post: